
One of the power features of the DITA environment is the linking mechanism. Combined with keys and conditioning, it gives single-source projects unexpected dimensions.
You can steer your linking strategy from the main ditamap of the deliverable in a clean, non-intrusive manner. The topics remain “neutral”, reusable in any number of projects. The content can be reassembled to fit different use cases, audiences, media, just by manipulating the topics hierarchy and the relationship table in the ditamap, without actually touching the topics. And another piece of good news: no more manually maintaining those miniTOCs…
The following examples are created in oXygen Editor v16, and generated using the PDF and the WebHelp scenarios. By integrating your customized plugins for the DITA Open Toolkit, you can further adjust the look and feel of the publications.
Hierarchic linking
Based on the topics nesting in the ditamap, and eventually the collection-type attribute, your publishing scenario can generate links between parent and children topics, links between sibling topics, and links to next, previous and prerequisite topics in a sequence.
The result also depends on how you set the parameter for related links in the publishing scenario or build script. To display the collection links, set the args.rellinks parameter to "all". If set to "nofamily", only the link to the parent topic is displayed, apart from the links generated from the relationship table.
You should also consider, whether you want your plugin to show or hide the short descriptions, and to group the links under a generic Related links label (makes sense to me), or to display the links by topic type: Related concepts, Related tasks, Related information, etc.
Let’s see a few examples of publishing from a ditamap with topics A, B, C, nested under an overview topic. Remember: You add all these links without modifying the topics source!
Example 1: Simple nesting
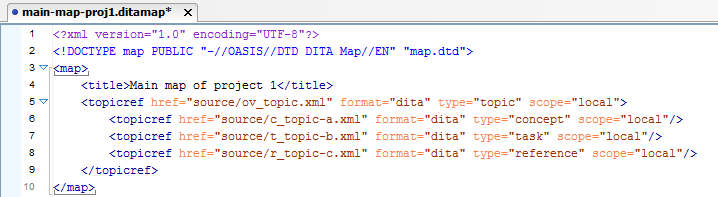
Output: In the PDF, the overview topic (parent) has links to the nested topics (children), and the children link to the parent.
Example 2: A family collection
Replace line 5 in the map with:
<topicref href="source/ov_topic.xml" format="dita" type="topic" scope="local" collection-type="family">
Output: The parent has links to the children; the children link to the parent and to each other.

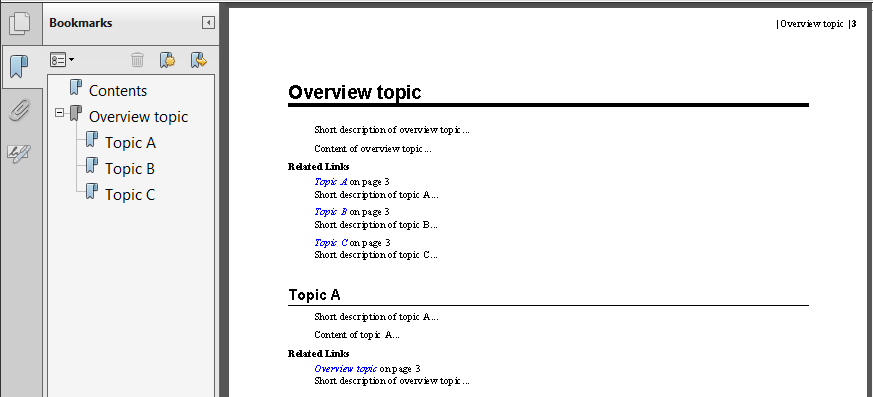
Example 3: A sequence collection
Replace line 5 in the map with:
<topicref href="source/ov_topic.xml" format="dita" type="topic" scope="local" collection-type="sequence">
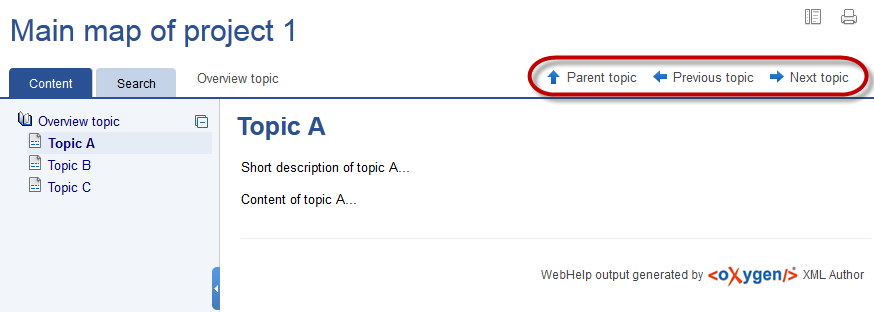
Output: Let’s look at the WebHelp output, this time. The parent has links to the children in an ordered list; the children have links to the parent, to the previous and to the next sibling.

Example 4: A required task in the sequence collection
Add the importance attribute to a required task in a sequence (line 6).
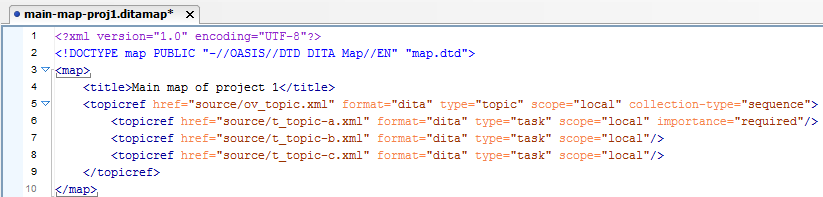
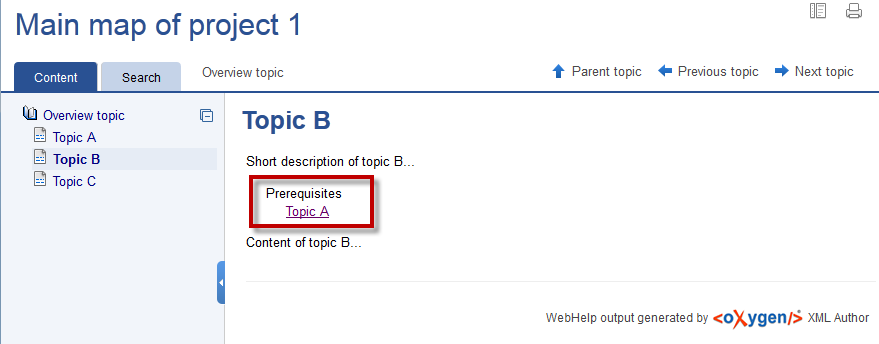
Output: The second and third topics contain a link to the first task, as prerequisite.
Relationship linking
To manage the linking between topics that are not hierarchically linked, create a relationship table at the end of the main ditamap of your deliverable. Remember, the map hierarchy also creates certain links, so you should avoid duplicates.
There are more types of relationship tables (reltable), but I prefer staying with the two-column reltable, which allows me to think of links as unidirectional or bidirectional arrows between the two cells of each row.
Apart from linking to DITA topics (concept, task, reference, etc.), you can use the reltable to add links from a topic to external sources, such as web pages or other PDFs.
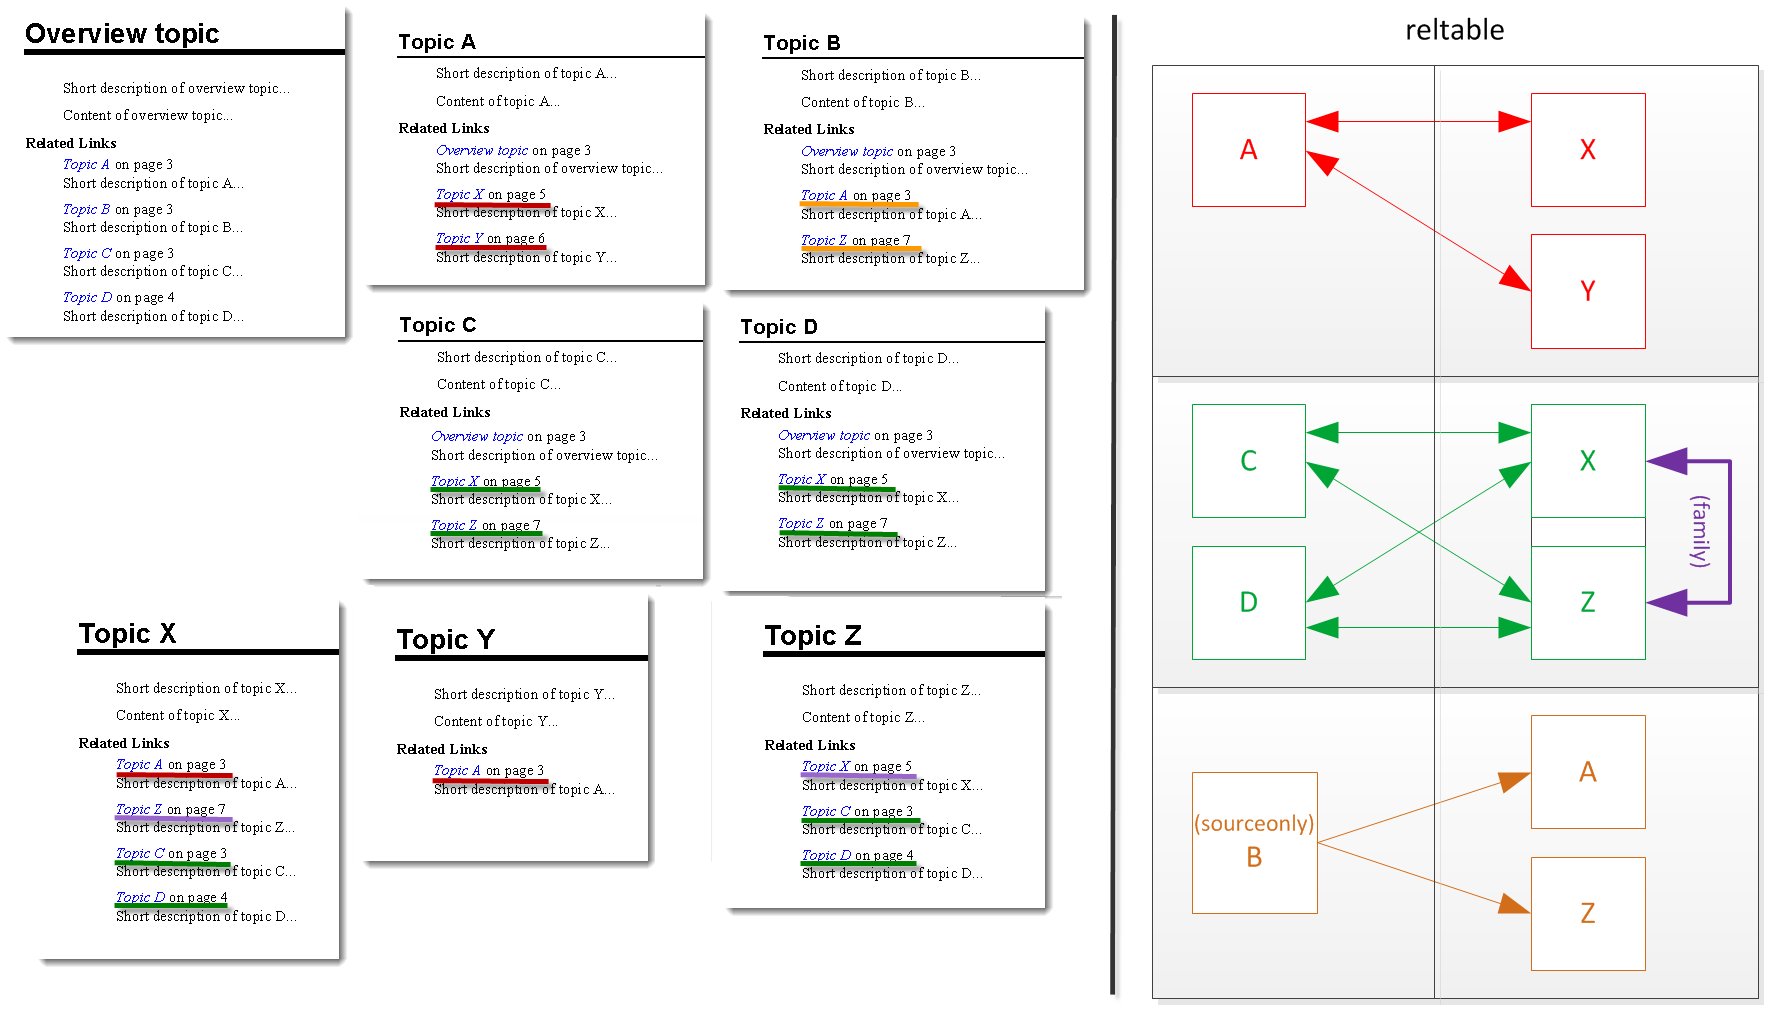
Example 5: Relationship table
A ditamap with topics A, B, C, D, nested under an overview topic, followed by topics X, Y, Z, and a relationship table.
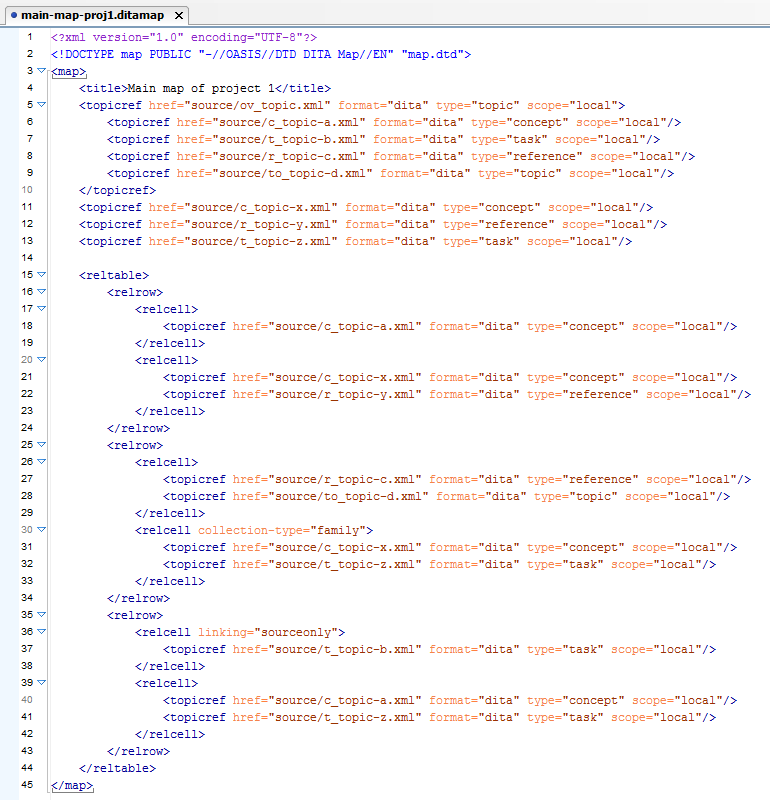
The example reltable contains three rows:
- The first row relates topic A to topics X and Y.
- The second row relates topics C and D with topics X and Z, while X and Z are also grouped in a
family(line 30), so they would also link to each other. - The last row defines a
sourceonlyrelation (line 36) from topic B to topics A and Z, which means A and Z will not link back to B.
I marked the related links in the published topics in red, green, purple and yellow, so you can identify them in the stylized reltable on the right.
To take advantage of these linking mechanisms, the authors in your team have to agree on writing topics for reuse, organizing the cross-references in the reltable and using keys for inline references. I’ll be writing about linking via keys in a future post.
Happy DIT’ing!

Pingback: DITA linking best practice at IEn2015 | Think DITA